The Idiot adds Two-Factor Authentication to Proxmox
A quick walkthrough for getting OATH-based 2FA running on a single Proxmox instance.
Let’s get some simple 2FA running on a single Proxmox instance. Because why not?
This guide assumes you already have a user account created in the PVE realm. I recommend creating a new admin account/group and adding the necessary permissions. For more information on that, refer to Proxmox’s User Management docs.
Steps
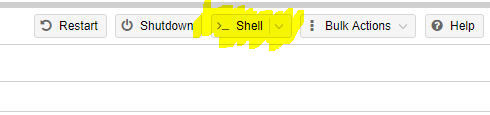
- Open a Shell within Proxmox.
-
Ensure your time in Proxmox is accurate with the
datecommand. If your time is off by more than 30 seconds, time-based codes will fail. -
Generate an OATH key with the
oathkeygencommand.
-
Copy the generated 16-character code and close the console.
-
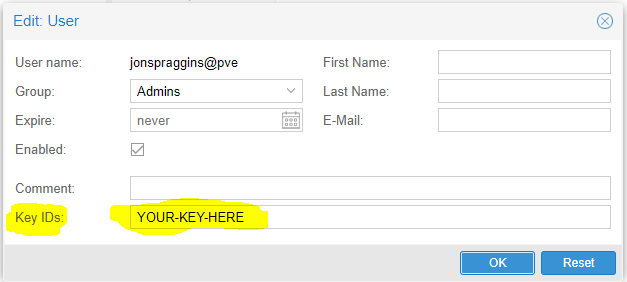
In the Datacenter view, open the Users tab under Permissions.
-
Select the user you want to add 2FA to and click Edit.
-
Paste the code into the KeyIDs field (make sure no spaces snuck in) and click OK.
-
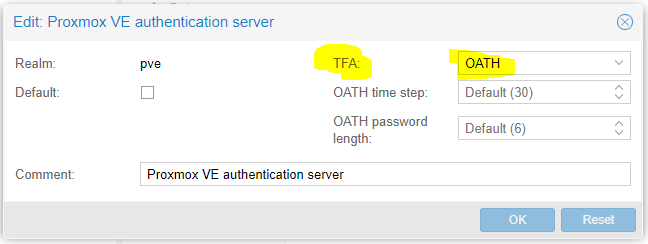
Select Authentication under Permissions.
-
Select
pveand click Edit, then set TFA to OATH and click OK. -
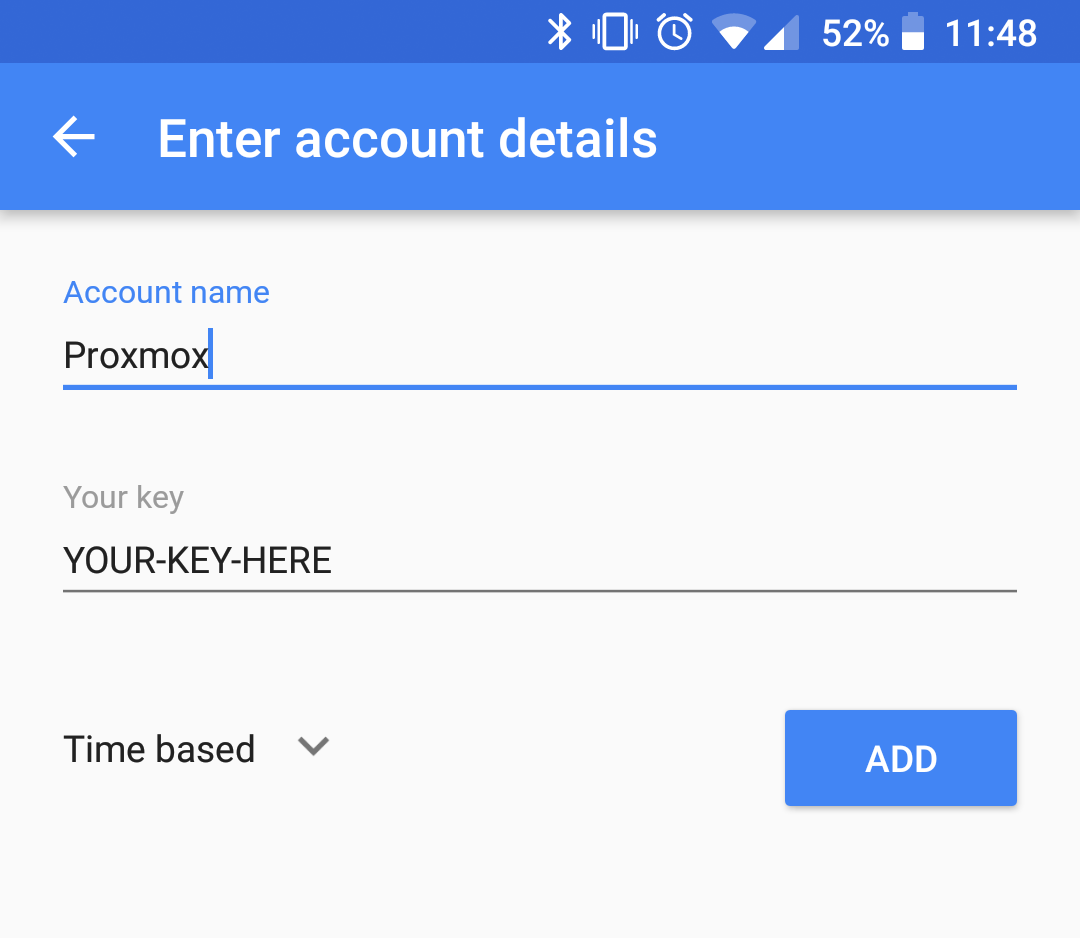
Add that same code to your authenticator app (I use Google Authenticator). The account name can be anything, but the key must match the code generated earlier. Leave Time based unchanged. Click Add.
-
Log out of Proxmox.
-
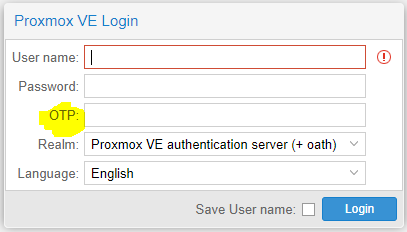
When you log back in using your account (don’t forget to select the right realm), an OTP field will appear. Enter the code from your authenticator.
That’s it — you’ve got 2FA on Proxmox.