The Idiot repurposed an old Army Radio
Stuffing a Raspberry Pi and Google Voice Hat into a vintage Army radio chassis to make a music player.
An ongoing experience merging old technology and newish technology.
Note: This is an in-progress write-up. It assumes some familiarity with Raspberry Pi basics and flashing OS images to SD cards.
Safety note: Projects like this involve exposed electrical wiring. If energized, it can damage components — and more importantly, hurt you. Be careful.
The Find
Back in late summer of 2018, a flood drove me out of my home for a few days. My roommate and I ended up bar-hopping in Petersburg, VA. Somewhere between Bar 3 and Bar 4, I wandered into an antique store and came across an Army Radio (Model C-845/U).
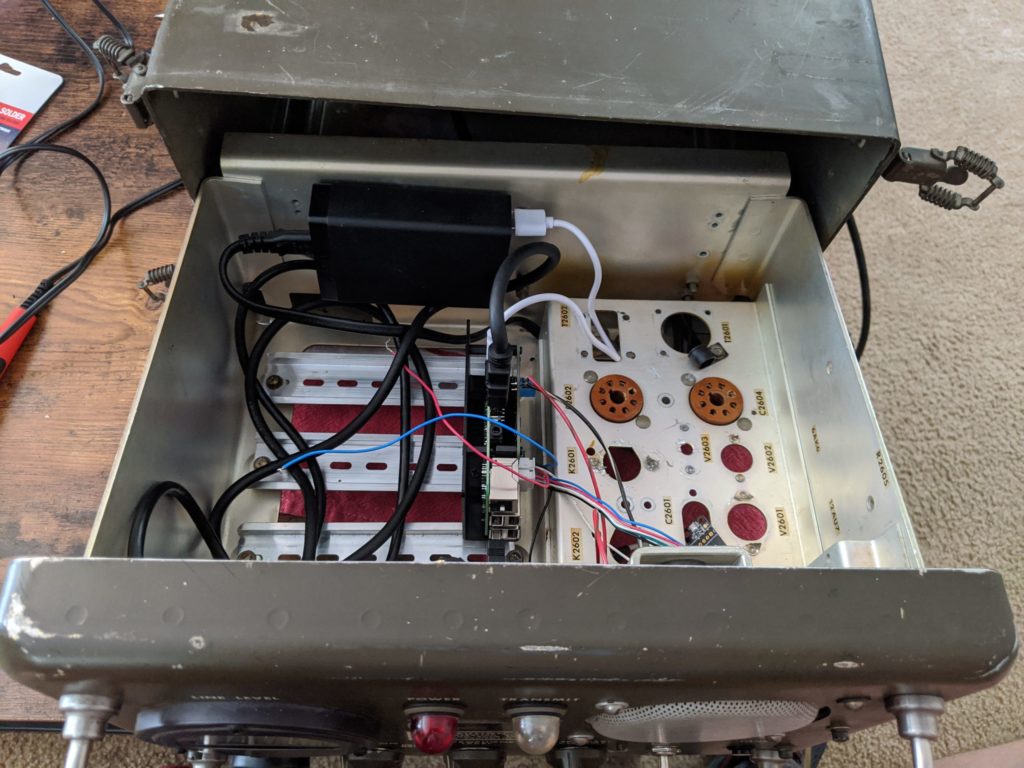
It sat as a paperweight for a few months while I figured out what to do with it. One weekend, I gutted the internals, assessed the space, and an idea clicked.
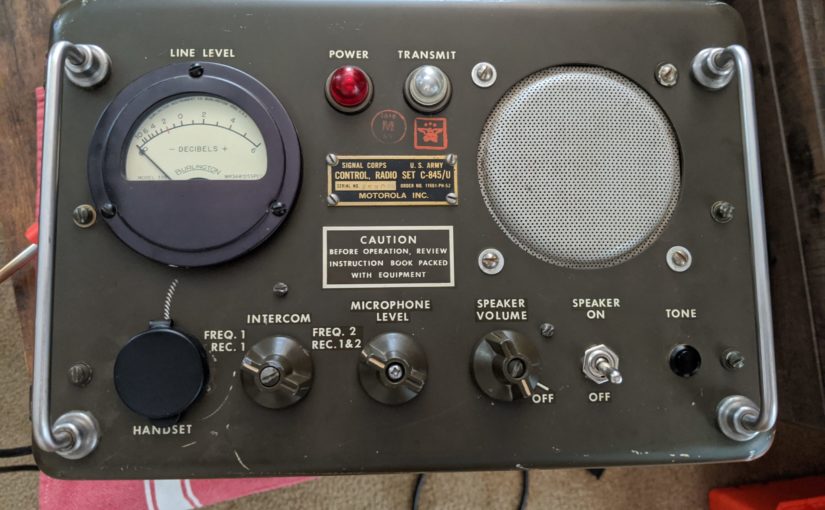
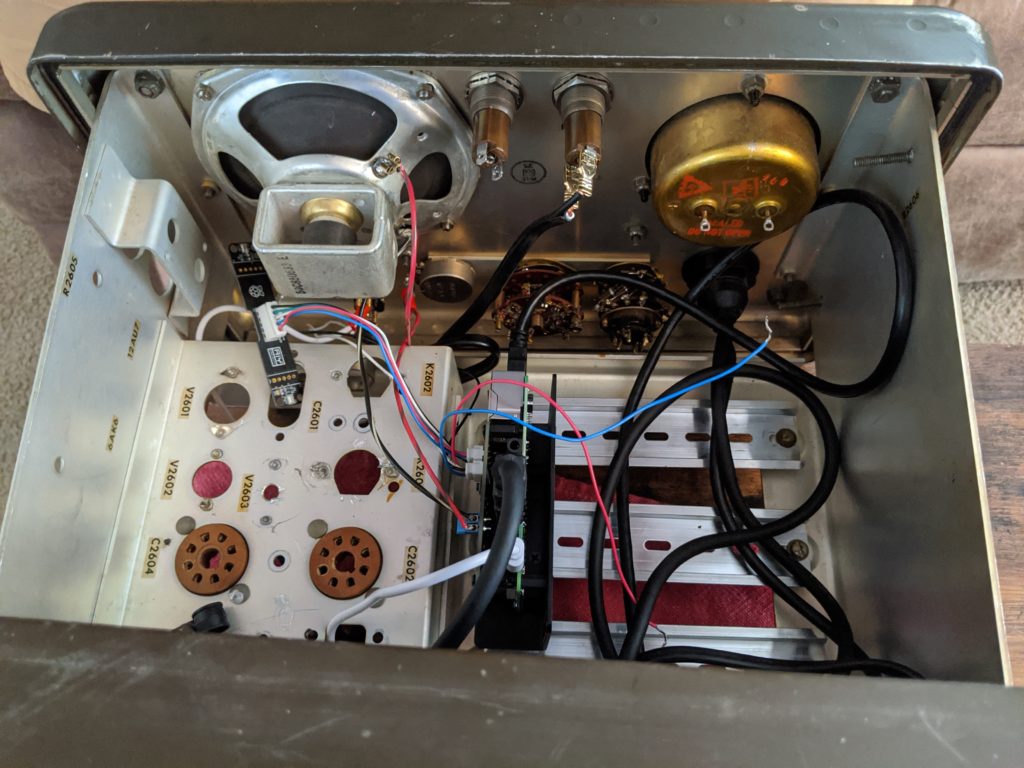
It had a working speaker, switches, and dials. After removing the old components, there was plenty of room for whatever I wanted to put in there.
Parts
- Raspberry Pi 3
- 32GB MicroSD Card
- (Deprecated) Google AIY Voice Hat V1
- Anker 60W USB Wall Charger
- Optional: 6″ DIN Rails
- Optional: DIN Rail Mount for Raspberry Pi
- Optional: Batige USB 3.0 & HDMI Extension
What It Does Now
I originally intended to turn this into a Google Assistant device using the Voice Hat. Unfortunately, the AIY projects codebase has since been deprecated and the “Hey Google” / “OK Google” hotwords no longer work with it.
So right now, the radio uses Tizonia to stream music. Volume is handled by the original potentiometer on the chassis — a satisfying analog touch.
Power is wired through a toggle switch that powers the indicator light, the USB wall charger, and by extension the Pi. I know that’s not ideal since there’s no graceful shutdown path. I’ve been looking into capacitor-based hats that can handle a clean shutdown on power loss.
I replaced the headset port with a USB + HDMI extension panel, just in case I want to plug in a keyboard and monitor.
What’s Next
Still working out what to do with:
- The DB gauge — I’m leaning toward tying it to audio output level, though that feels uncreative
- The transmit light
- The intercom and microphone level dials — the intercom dial could switch the Pi’s operating mode (music player → assistant → something else), but I haven’t figured out the implementation
The more I work on it, the more I think it has enough internal space for a Mini-ATX board with some modifications. Could be a fun future project.